
This DIY describes how to replace coolant on a 2007 CBF1000A Honda motorcycle and is applicable for 2006 to 2009 models.
This is an easy DIY task. A first timer may do it in 3 hours, an experienced in 1 hour.
Tools, spareparts and consumables needed:
Coolant must be high quality etylene glycol antifreeze with corrosion protection inhibitors (for aluminum engines) mixed with distilled water (1:1 mixture ratio).
Important: The Honda Shop Manual warns against using coolants with silicate inhibitors as these may cause premature wear of water pump seals or blockage of radiator passages. Using tap water instead of distilled water may cause engine damage. The easiest thing to do is to buy coolant specifically for bikes, and that is ready to use, i.e. already mixed.
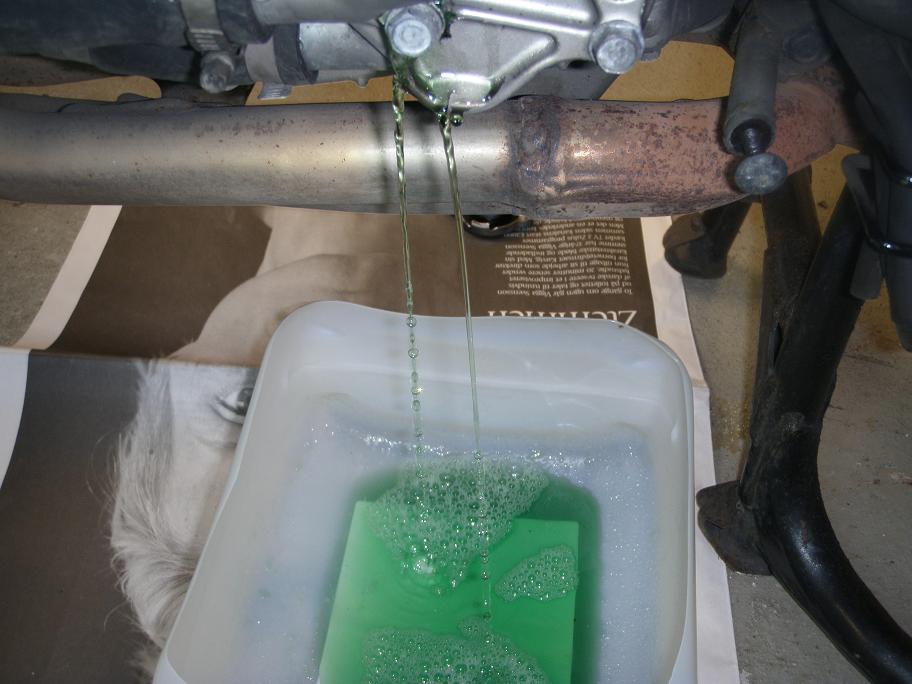
Important: Be sure to wash away any coolant spillage from the bike, as this may damage painted surfaces.
Warning: Never open the radiator cap while the engine is hot, as the pressure may be high and cause boiling liquid to spray out and scald you!
1.0 Remove seats - details
2.0 Remove upper cowls and inner pannels both sides - details
3.0 Lift the tank - details
4.0 Drain the coolant as described below:
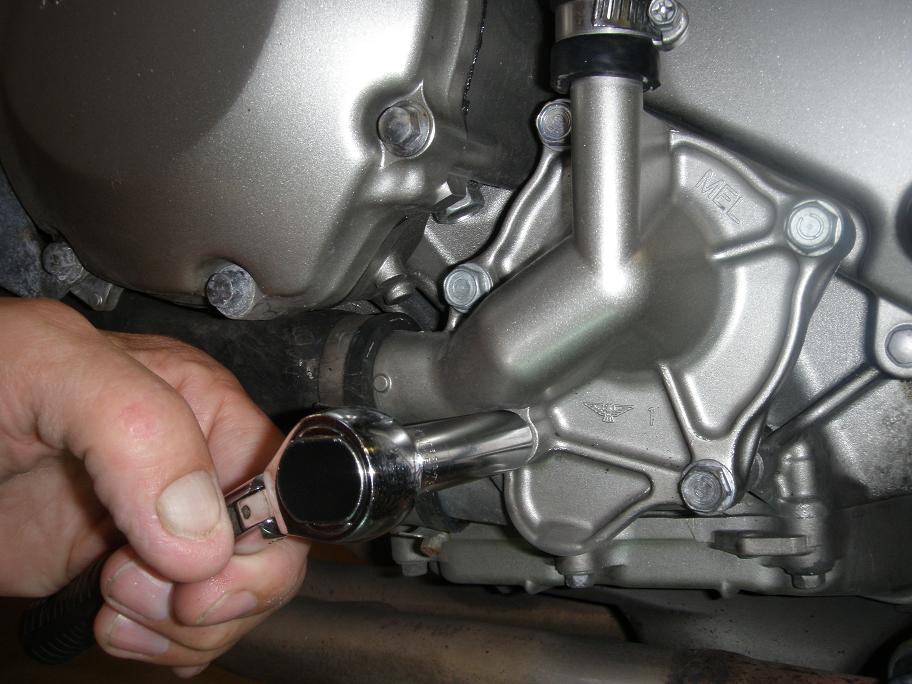
4.1 Remove the radiator cap (which is on top of the thermostat housing and not on the
radiator). Place a pan which can hold a minimum of 3 liters below the water pump and loosen the
drain bolt on the water pump slowly to let the coolant flow in a controlled manner into
the pan.
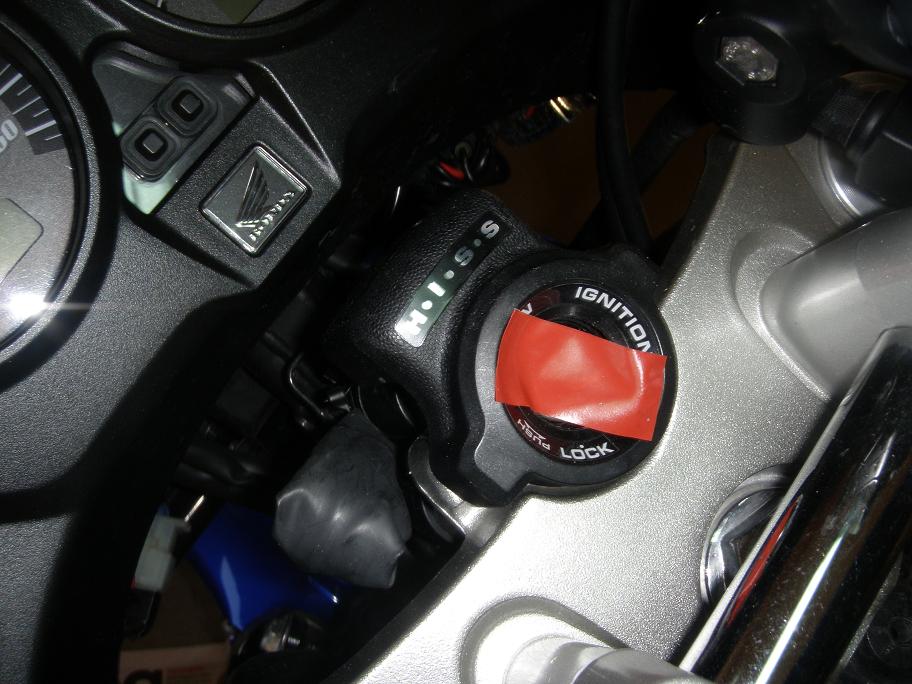
4.2 At this point block the ignition key hole with a piece of tape, to remind you that new
coolant must be added before you start the engine.
Remark:The following sections 4.3 and 4.4 follows the procedure outlined in the Honda Shop manual, but if you have some kind of suction aparatus awailable you may alternatively just use that to empty the coolant reserve tank.
4.3 Remove the battery - details.
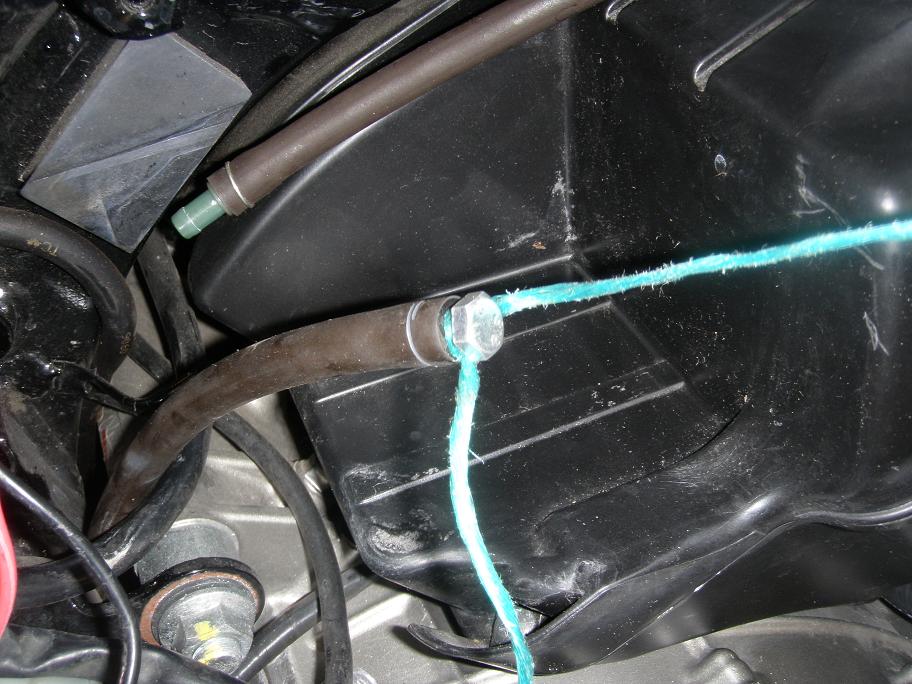
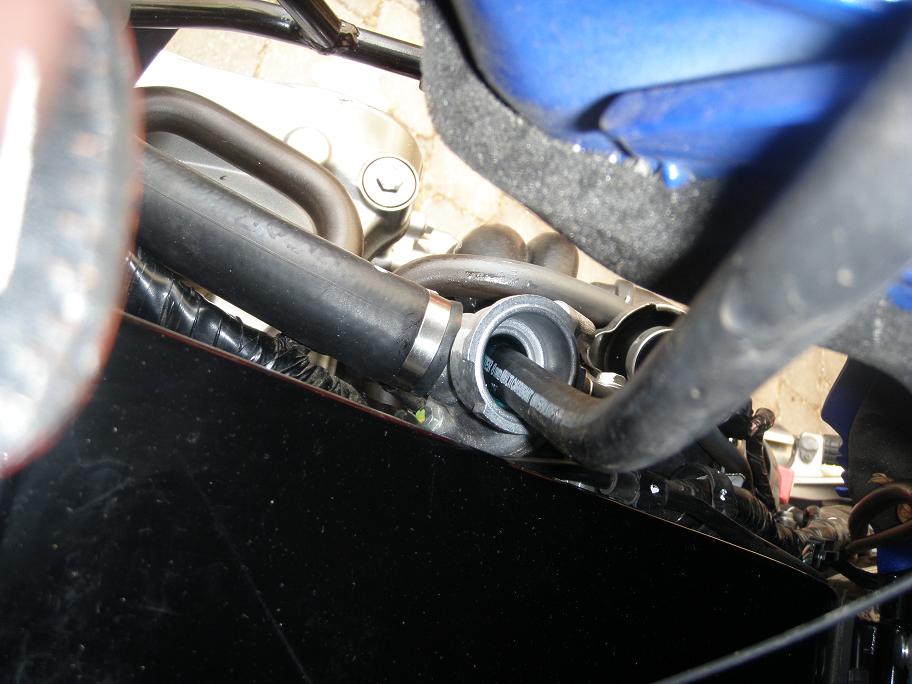
4.4 Release the siphon hose (red arrow) from its clamp (yellow arrow) and disconnect the
lower part of the hose from the hose joint. Plug the end of the hose with e.g. a 20-25 mm
long 6 mm bolt with a 1 m long string attached. Remove the rubber cap on the coolant reserve
tank, lower the hose down and out under the radiator reserve tank. Unplug and let the coolant
flow into a container. The Honda Shop Manual suggest to rinse the coolant container with water,
but normally that should not be nessesary.
Plug the hose again and ease the hose back up into place while using the string to pull it
in the right direction. Unplug and connect the two hoses again, and place them in their original
position.

Comment: The filling and air bleeding procedure given in the Honda Shop Manual for the CBF is incomplete, as it does not mention that you have to introduce the coolant not only into the radiator reserve tank, but also into the system at the thermostat housing under the tank.
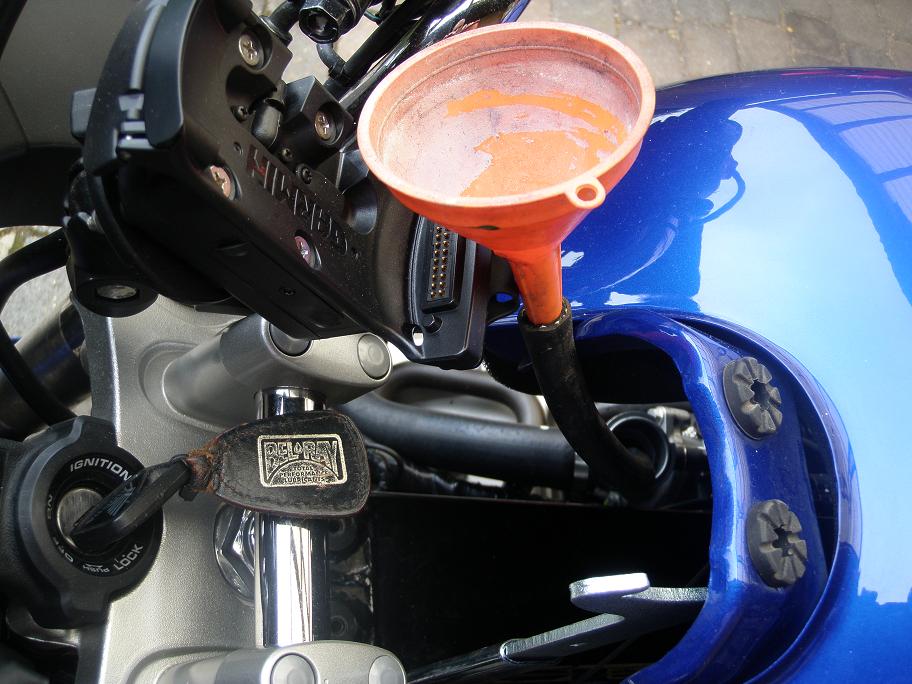
4.5 Using a funnel and a piece of tube, fill coolant slowly into the system at the
thermostat housing. Standing on the left side of the bike, you will be able to observe both
the funnel and the thermostat housing at the same time. It is a good idea to put some rags
arround the thermostat housing to absorb any spill over (this was not done when I took the
pictures below, and off course I ended up spilling down the engine and had to wash with plenty
of water afterwards). You must continue filling untill the level is up to the neck of the hole.
Now also fill the radiator reserve tank with coolant, up to the lower marking.
4.6 Install the battery - details.
4.7 With the transmission in neutral, start the engine and let it idle for 2-3 minutes. Then snap the throttle 3-4 times to help release trapped air from the system. Stop the engine and add coolant to the system at the thermostat housing untill the level is again at the neck of the hole. Reinstall the radiator cap.
4.8 Check the level of coolant in the radiator reserve tank and fill to the upper level indication. Reinstall the cap on the radiator reserve tank.
4.9 Lower the tank, instal cowls and seats, all by just reversing the respective procedures. Coolant drain bolt should be mounted with a new sealing washer and torque is 12 Nm (1.2 kgfm, 9 lbfft).
4.10 Take the bike for a test ride long enough to get the engine warm. Then check that coolant level in the radiator reserve tank is OK and that there are no signs of coolant leaks. Also after the next few rides, keep an eye on the coolant level to ensure that there are no leaks.
Finished.
© Copyright 2009 FireBladerDk - Last updated 2009-08-17