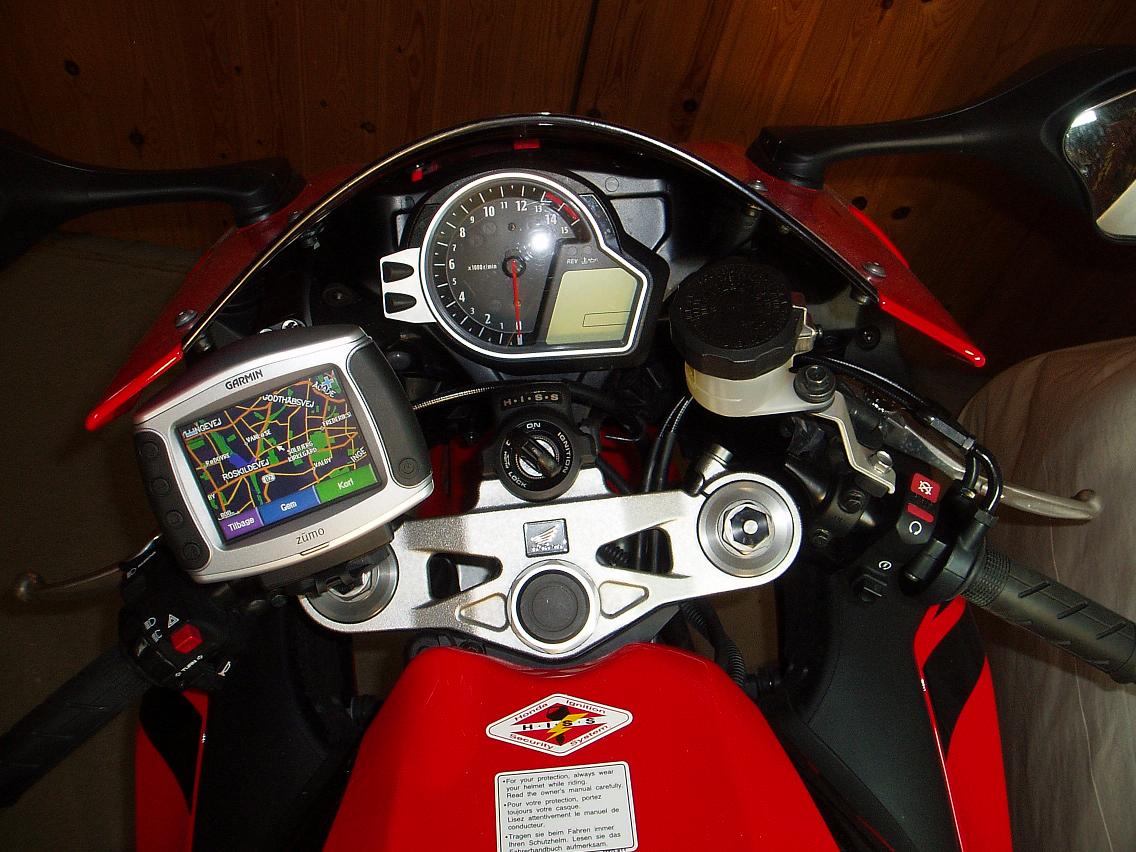
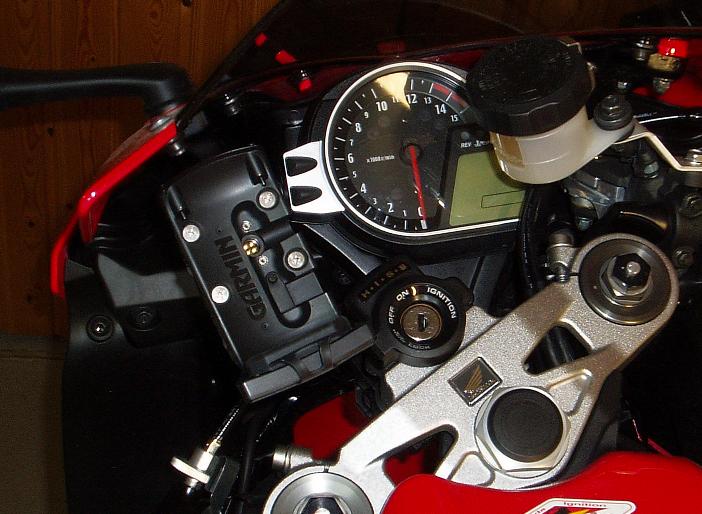
This DIY describes how you can install the Garmin Zümo GPS on a Honda CBR1000RR Fireblade motorcycle from 2008.
Riding Report marts 2009 - 100% success:
Marts 8'th 2009 and winter time was finally over here in Denmark. Comming in after my
first ride on the blade that year, I had good news about the GPS mount which I made during
the winter, and which is the subject of this DIY article:
- The mount is rock steady at all speeds (at least those allowed on Danish roads).
- There are no observable vibrations in neither GPS nor left mirror.
- It does not block any stearing movement or hand movement.
- It does not block view to anything on neither the dashboard nor or the left handle controls.
- You almost don't need to bend your head down to see the screen.
- Both left hand and right hand control is easy.
- The sound is crystal clear, i.e. no audible interference from ignition or alternator.
The Fireblade motorcycle offers very few good positions for mounting a GPS. I have not been able to find any good solution with the mounting fittings which were delivered with the Garmin Zümo GPS, so I have designed and built my own mounting bracket. It is hence a slightly time-consuming DIY tasks, but technically not very difficult.
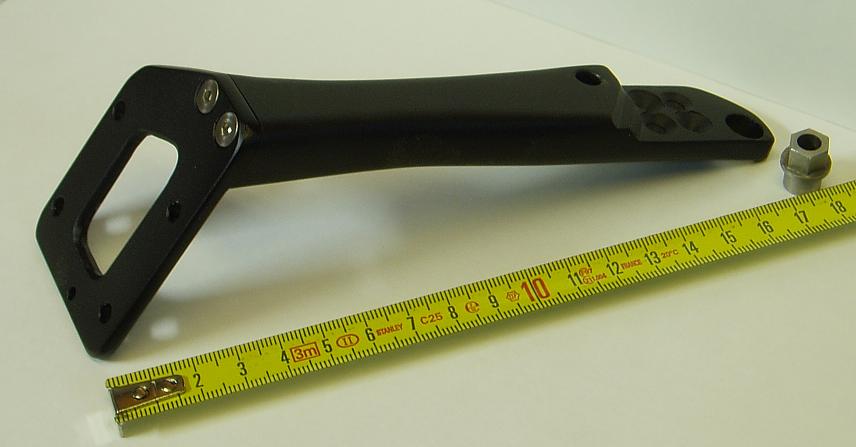
The mounting bracket is made in aluminum and has been black anodized to give it a
nice black color which is robust with respect to corrosion.
The shape has been made so it matches the front of the FireBlade. A number of large
holes has been drilled in the underside to reduce weight.
The bracket weighs less than 130 grams.
The left mirror mounting bolts are used to hold the bracket. One of the bolts
have simply been replaced with a longer 6 mm bolt, while ther other, being an integrated
part of the mirror, could not be changed. Hence I made a special mounting nut (see
above picture) on a metal turning lathe.
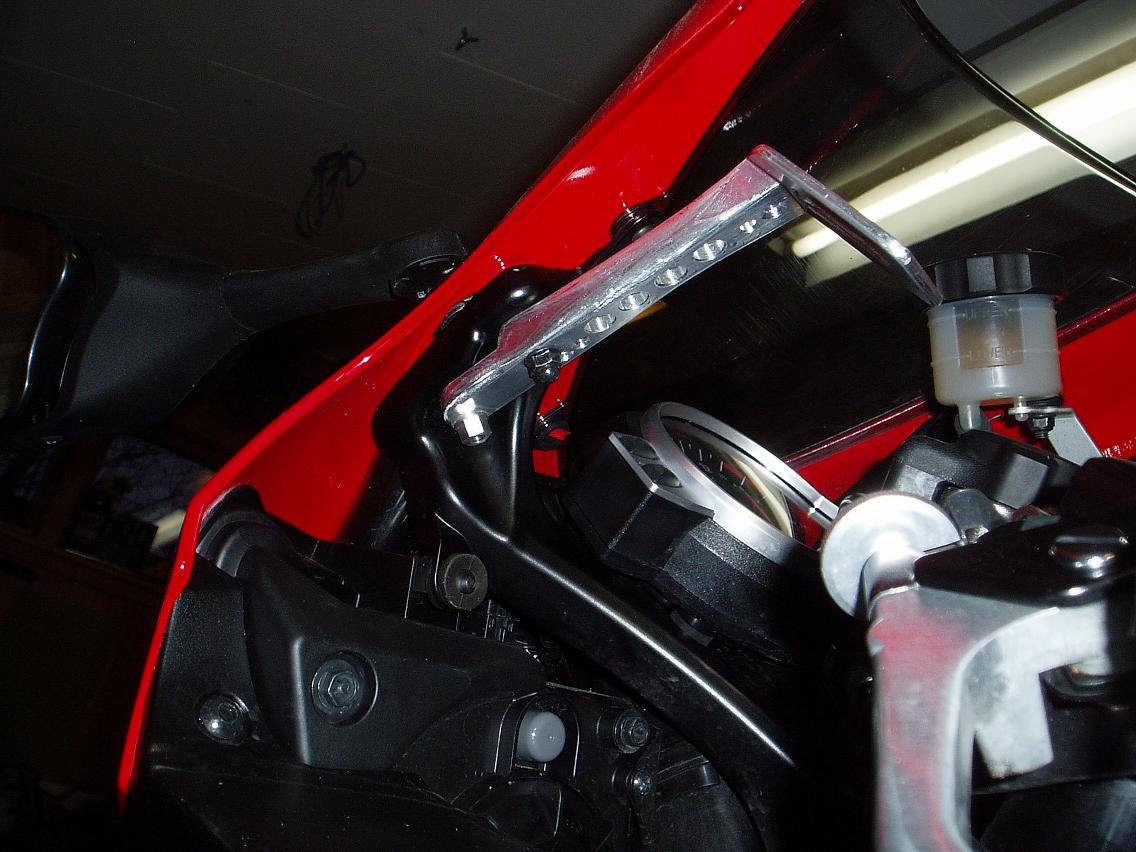
The angles and position of the GPS is fixed and can not bee adjusted, but there is
very little space to play with anyway.
Mounting anything close to the stearing of a motorcycle always calls for extra care that nothing goes wrong. It is therefore in this case important that you double-check for possible errors that might occur in materials and workmanship. Remember it is your own neck which is at risk here!
Unmount the two nuts holding the left mirror.
Shape the aluminum bar as shown on the drawing below (the drawing is
not to scale). You might want to make a model first in paper to get the correct
dimensions.
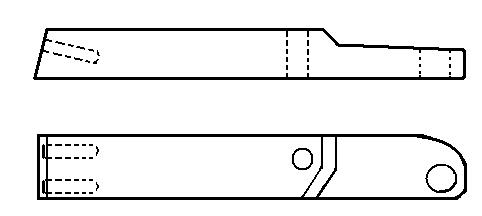
When the bracket fits correctly on the left mirror bolts, it's time to cut the other end to the correct angle and postion for the GPS.
Make the aluminum plate as shown on the above pictures and mount it with two 4 mm screws.
When a test-mount of the GPS shows that the bracket fits correctly, drill holes into the under-side of the bracket to reduce mass and give it a final shape and surface make-over. Then send it to a factory for anodizing. My bracket was anodized at Stjerne-Chrom.
Mount the finalized bracket and fix the GPS mount to it with four bolts. Mount the GPS wire and route it to the left down along the left side of the upper cowl. Cut it so that it is arround 15 cm longer than required for it to reach the mirror mount.
Umount the mirror and the bracket again. Pull the wire connecting to the left mirror
a couple of centimeters out of the hole and using a scalpel cut a hole to get access to
the wires inside (image below).

Route the GPS wire between the upper cowl and the black aluminum at the left mirror
mount so that the wire protrudes through the hole as shown in the image below.
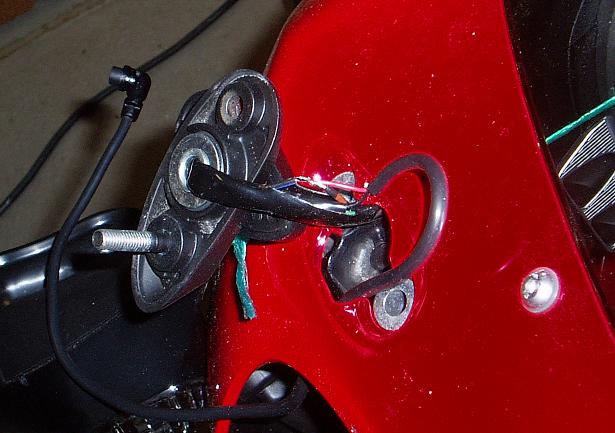
Using the scalpel, carefully cut away 5 mm of the isolation on the black/blue
wire (positive feed to the position light LED). Solder the red GPS wire to the black/blue
wire and isolate with isolation tape.
In the same way solder the black GPS wire to the green wire (ground feed to the position
light LED and turn signal bulb) and isolate it properly. Finally isolate the whole wire
assembly with isolation tape closing the hole that was cut previously.
Finally push the wires back into the hole in the upper cowl and mount the left mirror and the bracket. Mount the GPS and turn on the ignition. The GPS should now turn on also and you are finished.
The following thread on www.fireblades.org Garmin Zümo GPS Installation on a CBR1000RR 2008 may be used for comments and feed back.
© Copyright 2009 FireBladerDk - Last updated 2020-08-07