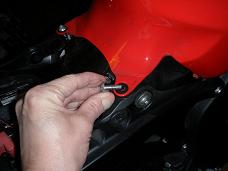
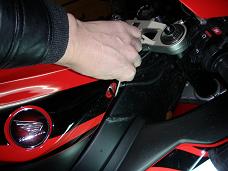
Just leave the rubber grommets in the screw-holes of the top shelter
This Do It Yourself (DIY) article describes how to remove the top shelter
on a 2008 CBR1000RR Honda Fireblade motorcycle.
This job is normally done for fuel system inspection or as part of
valve clearance inspection.
This is an easy DIY task which. A first timer may spend 45 minutes on it, an experienced may do it in 10 minutes.
Tools and Parts needed: qwe
Front Page - Other DIY Articles
1 Place the bike in upright position so you have easy access to both sides and to the front. You may do the job using the side stand only, but upright is easier.
2 Remove seat and side covers.
3 Lift the top shelter as described in the following:
3.1 Unscrew the two rear screws (image below left) and two front screws
(image below right) which holds the top shelter in place.


Just leave the rubber grommets in the screw-holes of the top shelter
3.2 Grab the bottom edge of the top shelter on both sides with your hands.
Pull a little outwards and then upwards with a tug sufficient to get the shelter
rim at the tank filling hole loosened from the rubber gromet.
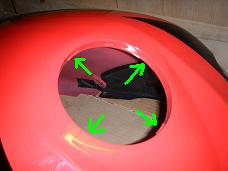
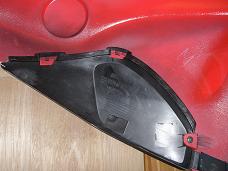
The top shelter can then be lifted up and and away from the bike. On the image
above left you can see 3 of the four plastic tabs (marked with green arrows)
inside the tank filling hole which are the reason for the tug you had to apply
to loosen the top shelter.
The image above right shows the inside of the right side. Here you can see how
the right air cleaner cover is mounted to the top shelter.
The images below shows the bike with the top shelter removed.
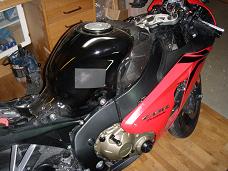
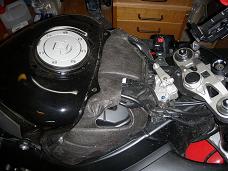
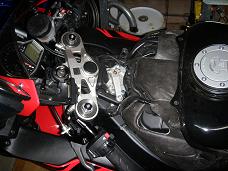
Installation procedure is same as removal procedure in reversed order.
4.1 Smear a little dish washer soap on the inside of the tank filler hole in the top shelter and press it onto the rubber seal arround the tank hole.
4.2 Smear a little cobber grease on the threads of the four mounting screws to prevent corrosion and mount the bolts.
5 Reconnect the Battery.
6 Remount Seat and Side Covers.
Finished.
Front Page - Other DIY Articles
You are invited to participate with review, questions and discussion via this thread on www.fireblades.org or this thread on www.1000rr.net.
See also:
How to DIY (warnings, tips, tools,
methods, ... etc.)
First Year
with my Fireblade
Superbikes on the Road: BMW S1000RR versus
Honda CBR1000RR Fireblade
Endurance in Rumanian Mountain
Forrests 2012
Front Page - Other DIY Articles
© Copyright 2012 FireBladerDk 2012-08-22.