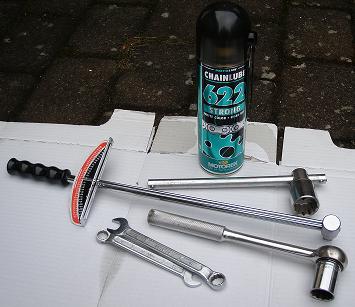
- 12 and 14 mm spanners, 22 and 27 mm tops,
- axle nut torque 98Nm (10kgftm), Shop Manual specifies 108Nm,
- lock nut torque 21Nm (2.1kgftm).

This DIY describes how to maintain the chain on a 2007 CBF1000A Honda motorcycle and is applicable for 2006 to 2009 models.
Chain maintenance comprices two separate tasks:
Both tasks are dead-easy and requires only a few tools. They are summarized here:
... and explained in much more detail further below, to help those doing this for the very first time.
A typical symptom (for CBF1000A) if the chain is too slack, is that you will hear a cluncking sound when you snapp off the gas at slow speed. That is the chain hitting the underside of the swingarm.
And notice - nothing about cleaning. Riding on Danish roads, I have never found any need to do cleaning work on the chain.
Consumables needed:
Chain Oil: The owner's manual perscribes SAE 80 or 90 gear oil for chain lubrication. I prefer to use colored spray based types. They are easy to apply and the color makes it easy to see how much is left on the chain, e.g. after driving in heavy rain. The spray oil must be applicable for O-ring chain types.
Tools needed:
Safety:
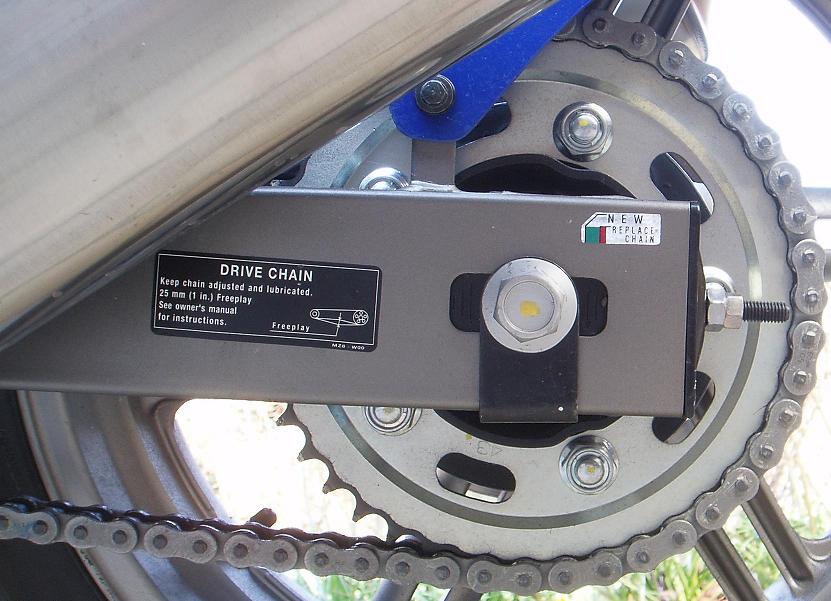
A chain that is too loose as well as a chain that is too tight may cause failure, and so can a chain with too much wear. Be aware that the chain is a highly stressed parts. It must be able to transfer up to 98 hp continuously and to sustain the forces required for e.g. a wheelie. It must be able to do this fully loaded or with just a 50 kg driver in the seat. Hence make sure the slack (freeplay) is always within the specified 25 mm (1 in.) limit (see the label in the above image).
The chain should be lubricated and inspected every 1000 km or less. Oil is cheap and a new set of chain and sprockets is expencive, so keep the interval low.
Put the bike on the center stand. Turn the rear wheel and inspect the chain along
its entire length. Inspect that there are no indications of worn or damaged links. Also
inspect the rear sprocket for worn teeth. Measure slack as follows: Apply pressure downwards
on the mid point on the lower chain segment. Then apply upward pressure on the same spot.
The amount of pressure is not critical, what a finger can easily do is adequate. The slack
is equal to the distance you can move the chain. Repeat the slack measurement a couple of
times with the rear wheel in different positions. If the slack is not constant, this indicates
that some links are kinked and binding. If this occurs you have waited to long since last
lubrication or your bike has been standing still for too long time - shame on you!

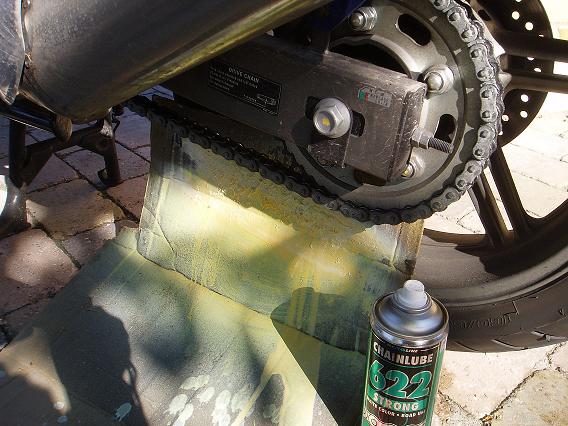
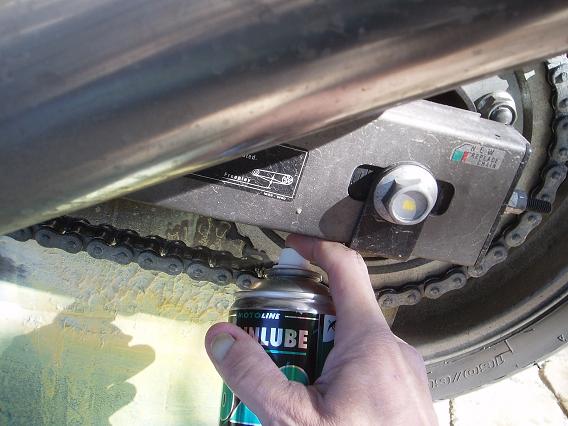
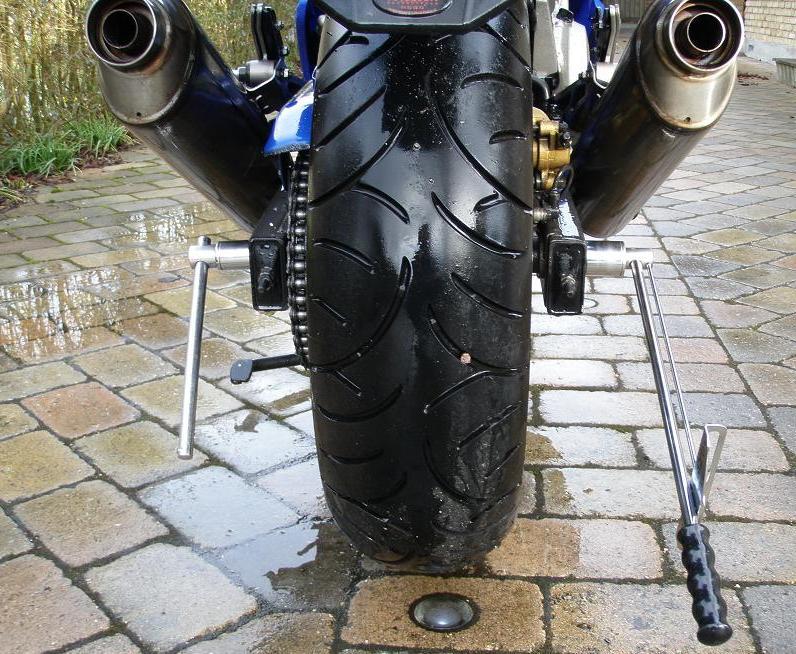
Lubricate the chain in its entire length. I keep reuseing the same piece of corrugated cardboard to prevent the oil hitting the rear wheel as show on the images below. If there are any kinked and binding links they should be wrickled loose and slack should be retested.
Now put the bike on the side stand and be sure to do this! If you do the
following slack adjustment while on center stand you may end up with to little slack, and
eventually a high speed disaster over a distant hilltop - not kidding! This is because the
more load you have on the rear wheel the more tight the chain becomes.
Now measure the slack again. It should be in the range 20 to 30 mm. If the slack is more than
30 mm it is time to adjust it, as described below.
If this is the first time you do this on your bike, I recommend that you remove the 12 and 14mm nuts on both sides, apply copper grease to the threads and reinstalls the nuts again. This will prevent future corrosion problems here.
You may have the bike on center stand or side stand while doing the following adjustment, as long as you put it on side stand for final slack measurement.
Using a pair of wrenches - one with 22 mm top and one with 27 mm top - loosen the right side 27 mm axle nut, while holding contra on the left side 22 mm axle nut. The tourge required is quite high, so be carefull not to end up with your bike tumbling over on its side.
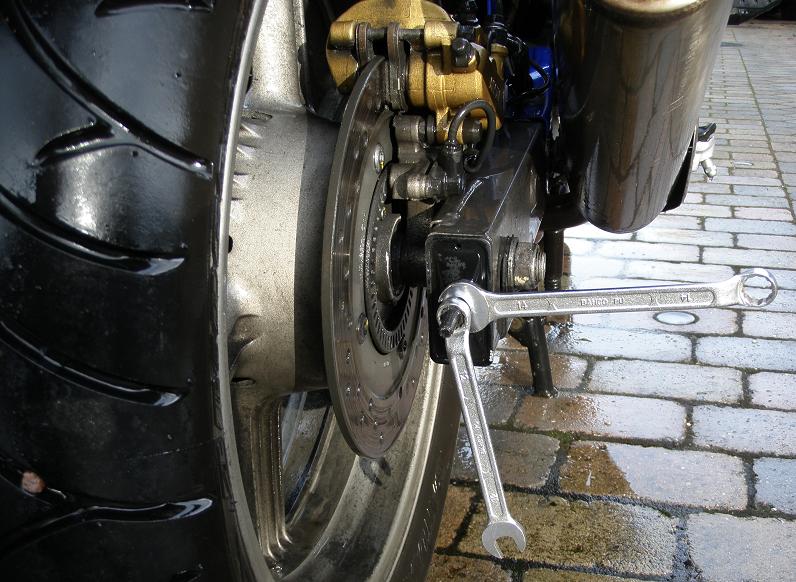
Loosen the 12mm lock nuts on both left and right side of the swing arms. While doing this, hold contra on the 14 mm nuts, so they do not turn. During the following adjustment procedure we keep track on how much these 14 mm nuts are turned, because this way rear wheel allignment will be preserved. The threads inside the 27 mm axle nut may also be given some copper grease while you are at it.
Since the 14 mm nuts are hexagon shaped, each side of a nut is angled 60 degees relative to the neighbor sides. Hence it is possible count how many times 60 degrees you turn each 14 mm nut, and hence it is possible to keep the adjustment on the left side precisely synchronized with the right side.
IMPORTANT: In the following, be sure to turn the 14 mm nuts clockwise only, i.e. in the direction which tightens the chain. Never turn a nut anti-clockwise, as it will just come loose and the rear wheel axle will due to friction not move in a controlled manner.
Repeat the following two steps untill the slack is close to 25 mm:
While holding contra on the left side 22 mm axle nut, tighten the right side 27 mm axle nut to a tourge of 98Nm (10kgftm).
Check that the slack is still correct.
Put the bike back on center stand and turn the wheel, listening for abnormal sounds, and checking that the chain is running smoothly over the sprocket teeth .
While holding contra on the 14 mm nuts, tighten the 12 mm lock nuts.
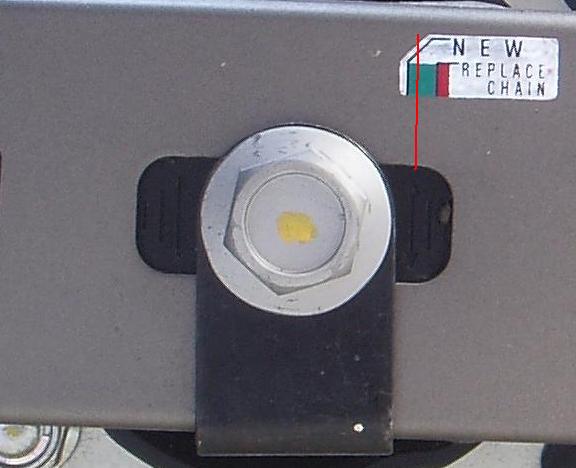
Check that you have not yet exceded the wear indicator (see image below). If you have,
it is time to renew sprockets and chain as soon as possible (subject for another DIY
article).
Also check that left and right sides are adjusted identically, i.e. that the markings
on each side are identically alligned.
Take the bike for a test drive. There should be no abnormal sounds from the chain.
Finished.
If you want to take on other DIY jobs you might benefit from reading the How to DIY (tips, tools, methods, ... etc.) article.
You may mail comments directly to me (mail addres is on the front page).
© Copyright 2009 FireBladerDk - Last updated 2020-08-09