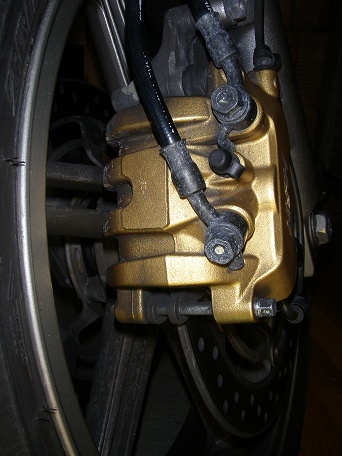
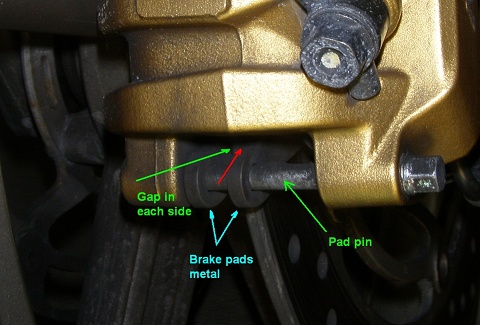
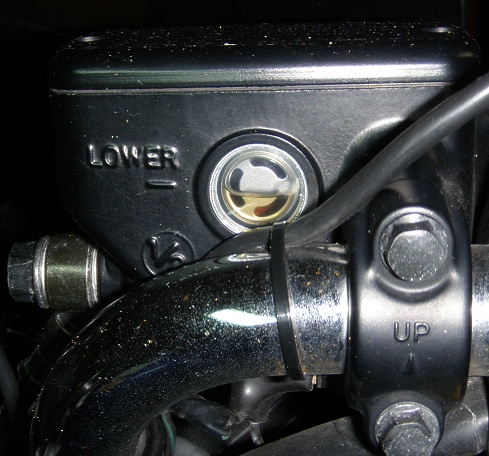
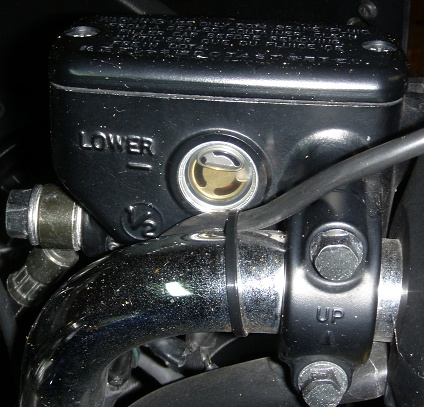
Images above from left: Right side brake caliper, pad pin and gaps, front brake fluid container
This DIY describes how to replace front brake pads and brake fluid on a 2007 CBF1000A Honda motorcycle and is applicable for 2006 to 2010 models. I do not know to which degree it is applicable for any later models.
The front brake pads on a CBF1000A typically need replacement every 25-35.000 km, depending, off course, on your driving style.
Don't ever wait too long. If you do, you will one day suddenly hear a rough sound of metal scratching against metal when you brake, and the braking ability will be poor. The hardened surface on the brake disk will be scratched and in principle need replacement. Expensive Lesson!
It is normally OK to replace only front or rear pads one at a time, but if you are in doubt, just replace both ends. The spare parts are not very expensive and the hours come for free when you DIY.
Your daily inspection should include a check of the brake fluid level in the reservoir on the right side of the steering handle bars (image below right). Any sudden drop in this level will indicate that there is a serious leak in the system and immediate inspection and service is required. As the brake pads are worn down, the level will gradually fall and a low level means that the pads are probably due for replacement.
Every 3000 km or so you should visually inspect the thickness of the brake pad
material on all four sides of the front brake disks (image below center). Look at the
edge of the brake disk near the pad pin which holds the brake pads in position. It is
easy to see the size of the gaps between the pad metal and the brake disc edge. This is
the amount of brake lining material which is remaining. On a new pad the gap will be
around 4 mm . If it is now less than 1.5 mm on either side, it is time to do the
replacement.
Remark: The Honda Shop Manual states that the pads must be replaced if they are worn to
the wear limit groves, but these can be somewhat difficult to see, so I find the above
method easier.
If the pads have large difference in remaining thickness, this indicates that the caliper is not able to slide freely from side to side on the caliper pins as it should. This could be due to rust or dirt on the pins which should hence be serviced (subject for another DIY article).


Images above from left: Right side brake caliper, pad pin and gaps, front brake fluid
container
Check that the brake hoses are in good condition along all thier length and correctly supported on all their mounts. There should be no cracks in the surfaces and no other indications of damage, and certainly no signs of leaking brake fluid.
This is a very easy DIY tasks. A first timer may spend half an hour doing it, an experienced around 10 minutes. If you are not already an expert in DIY work you might also benefit from reading the How to DIY (tips, tools, methods, ... etc.) article.
Spare parts needed:
Tools needed:
Tips:
When doing DIY work you will undoubtedly at some point run into troubles like e.g. stuck bolts or other things which will not come apart. Instead of just spinning out of control using the big hammer, have a look in the " Undoing Stuck Bolts, Nuts and other Metal Parts" section.
Safety:
If you keep the brake disk and the brake pads clean and well away from any oil or grease contamination, this is a simple and safe DIY task, and your brakes will work perfectly afterwards. Should you in any way feel that the braking efficiency has degraded, you must of cause be a critical judge of your own work, and recheck your work until the job is right. Brake pads that have been contaminated with oil must either be replaced with new pads or ground sufficiently down with sandpaper.
Do not forget the test ride after you have replaced the brake pads!. See more below.
First action is to wash your hands to be sure the brake disks and pads are not contaminated with any greasy stuff.
Remove lid and rubber boot on front brake fluid container so you can watch the fluid level changes during the following steps.
Starting with e.g. the right side and using hand force, push the brake caliper towards the front wheel. You will most likely need to use both hands as shown on the image below. Keep the pressure steady for the time it takes to push the three pistons back into the calliber and the brake fluid back into the reservoir which you should be watching so it does not overflow. Notice from the image (below right) how the level has risen.
Remark: I forgot to mention the following in the first version of this article and I still need to get it confirmed: The center piston in the right side front brake caliper is connected to the brake pedal, i.e. the rear brake system, so when you apply pressure on the brake pedal it is not only the rear wheel which is braking, but to some degree also the front wheel. Therefore, when you press the right front caliper towards the front wheel it is not only in the brake fluid container on the stearing bars the level will rise, but also in the reservoir for the rear system.
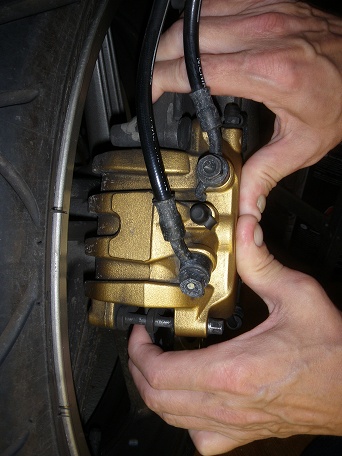
Images above from left: Pressing the pistons back by hand force - brake fluid level
has risen.
OBS: It can happen that the inner material in a brake hoose comes partly loose so it can block the break fluid stream in either forward or backward direction. Such an error can make it difficult or even impossible to push the pistons back. This happend one time width my car, and I spent an hour struggeling with it before I understood the reason. The it was just a matter of replacing the old hoose with a new one.
Now pump the front brake handle several times untill it again feels normal hard, i.e. untill the brake pads are again in full contact with the brake disc. Repeat this a couple of times more. This is done to release any dirt which may have grown stuck inside the caliper thereby ensureing that the pistons are able to move freely back and forth without binding. Binding pistons can cause excessive friction and consequent brake disc over-heating! When this is done, press the pistons fully back, to be ready for the next step.
This is the time where you make sure that nobody by accident applies the front brake on the bike while you are working. If that happens the pistons will be pressed out and eventually pop out!
Width the three pistons fully back, unscrew and withdraw the pad pin until the inner brake pad is free (images below). Keep a hand on the pad which is likely to fall out by itself if you don't. Ease the pad out while paying attention to how it was placed, because later you must be able to reverse this procedure, to mount the new pad into the same position.
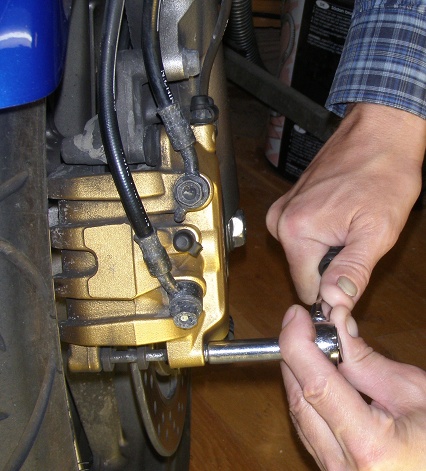
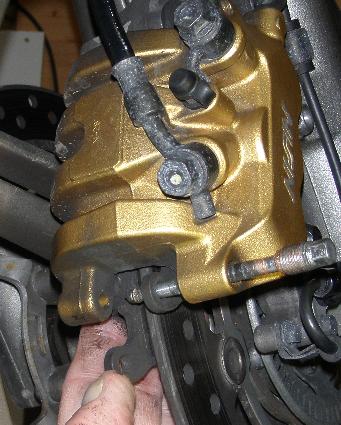
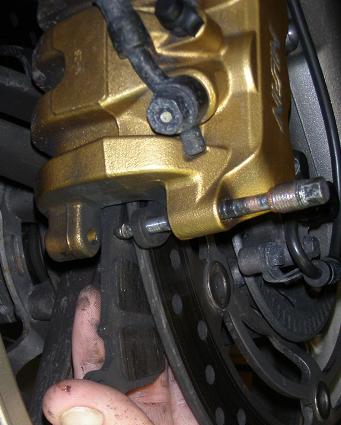
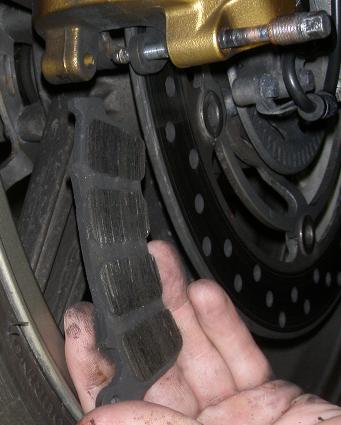
Images above: Unscrewing the pad pin and removing the inner brake pad.
Withdraw the pad pin completely and remove the outer brake pad (below left).
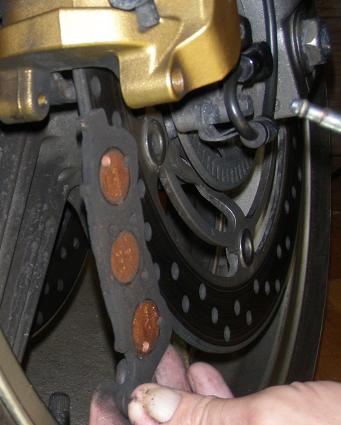
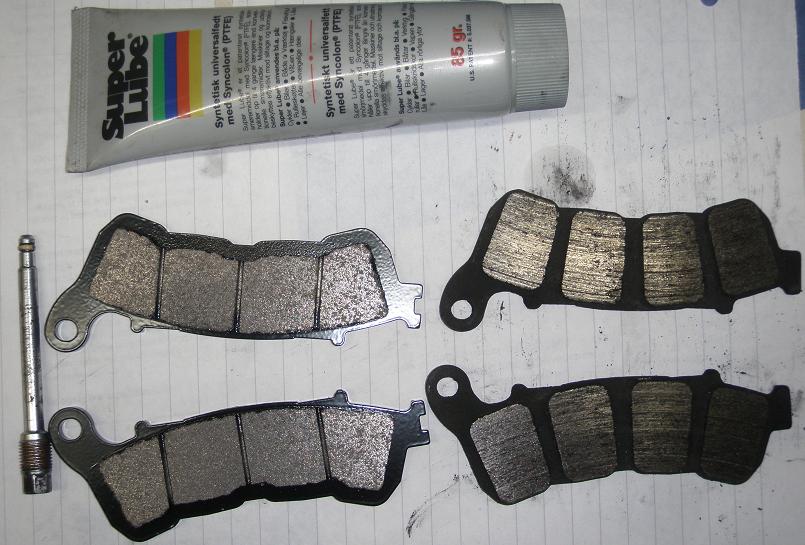
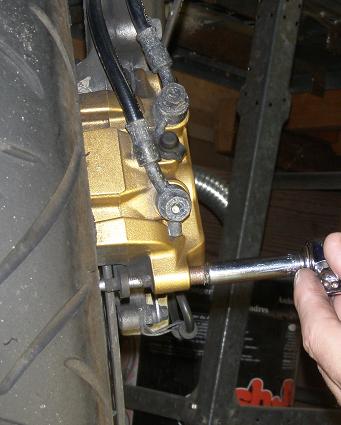
Images above from left: pad pin and outer pad removed - pad pin, new pads, old pads and silicone
grease - remounting the pad pin.
When both pads are removed, make sure that the pad spring is in its correct place. You may e.g. use a mirror to get a good view from underneath.
With the pads off, it is now easy to check that the caliper can be moved easily back and forth on its caliper pins.
Clean the pad pin and smear the O-ring (the Honda Shop Manual calls it the stopper ring ???) at the end of the pad pin with silicone grease. Also smear a thin layer of silicone grease on the stem of the pad pin to protect against corrosion and smear the threads with copper grease to ensure that you can loosen it next time you replace the pads.
Re-insert the pad pin partly and insert the new outer brake pad into the calliber
until the upper end rests properly into the pad retainer. Then apply a small
amount of pressure against the pad spring to align the hole in the pad with the
pad pin which can then be pushed further in and hold the outer pad in position.
Insert the inner pad into position and install the pad pin using a tourque of 17
Nm (1.7 kgfm, 13 lbf ft).
Operate the brake lever a couple of times to make the brake pistons settle into place. The brake lever should now feel normal and hard.
Now repeat the entire process on the other side of the bike.
According to the Shop Manuals maintenance schedule, the brake fluid must be
replaced every 2 years or every 18.000 km whichever comes first. The official
reason for replacing the brake fluid is that it over time absorbs water vapour
from the air, and this water can evaporate when the brakes get hot and form
compressible gas boubles in the liquid with consequent poor braking performance.
Furthermore the water may cause increased corrosion inside the brake system
components.
In practice I have never experienced such problems, but there is another important
benefit from frequent bleeding: it prevents the bleeding screws from rusting so
stuck to the brake caliper that it will brake off when you then really need to use
it.
I hence recommend to perform the following simple bleeding process on each brake caliper at least every 2 years:
Remove the lid and rubber boot from the top of the front brake fluid container.
Use a 6 edged socket wrench to loosen the bleeding screw on one of the front brake calipers just one 10'th of a turn and immidiately retighten it. The purpose of this is just to get the screw loosened while you have a good and solid grip on it with the 6 edged socket. If you use a 12 edged socket you run a serious risk of damageing the bleeding screw. Be sure to close the screw quickly, so no air gets into the system.
Then attach a hoose of appropriate diameter to the bleeding screw and feed the
other end of the hoose into a bottle placed below the bleeding screw. Using a star
wrench, open the bleeding screw one 6'th of a turn or so, just enough for the liquid
to be able to pass out. Pump hard and fast with the brake handle untill the brake
fluid container is almost empty. By pumping fast you will flush out any air boubles
that might be in the system. Be carefull not to let any air get down through
the system. Be sure to retighten the screw fast, so not air gets sucked back into
the system
Then top up width fresh brake fluid untill it reaches the maximum level mark.
Repeat this bleeding procedure for the other brake calipers on the bike.
Take the bike on a test drive. After a few brakings, the brakes should function and feel normal. Then drive a few minutes without using the brakes and let the bike roll to full stop. Get off and check the temperature of the brake discs by hand. Temperature should be the same on both sides, and the disc should only feel slightly warm. If it feels very hot, this indicates a problem with either a binding piston or that the caliper does not slide easily on the caliper pins.
Finished.
The thread Brake Pads - Front, Replacement - DIY Article on www.cbf1000.com may be used for comments and feed back, or you may mail directly to me (mail addres is on the front page).
© Copyright 2010 FireBladerDk - Last updated 2020-08-07